안녕하세요. 오늘은 CI/CD 환경 구축을 진행해보려고 합니다.
CI/CD란?
지속적 통합(Continuous Integration)/지속적 배포(Continuous Deployment)
| CI/CD는 애플리케이션 개발 단계를 자동화하여 애플리케이션을 보다 짧은 주기로 고객에게 제공하는 방법입니다. CI/CD의 기본 개념은 지속적인 통합, 지속적인 서비스 제공, 지속적인 배포입니다. CI/CD는 새로운 코드 통합으로 인해 개발 및 운영팀에 발생하는 문제(일명 "인테그레이션 헬(integration hell)")을 해결하기 위한 솔루션입니다. 특히, CI/CD는 애플리케이션의 통합 및 테스트 단계에서부터 제공 및 배포에 이르는 애플리케이션의 라이프사이클 전체에 걸쳐 지속적인 자동화와 지속적인 모니터링을 제공합니다. 이러한 구축 사례를 일반적으로 "CI/CD 파이프라인"이라 부르며 개발 및 운영팀의 애자일 방식 협력을 통해 지원됩니다. |
이러한 역할을 하는 것이라 합니다.
https://www.redhat.com/ko/topics/devops/what-is-ci-cd
CI/CD(지속적 통합/지속적 제공): 개념, 방법, 장점, 구현 과정
CI/CD는 애플리케이션의 통합 및 테스트부터 제공 및 배포까지 전체 라이프사이클에서 지속적인 자동화와 모니터링을 제공합니다. 개념, 차이점, 학습방법(인강)을 보세요.
www.redhat.com
여기서 제가 해볼 것은 gitlab 프로젝트에 ci/cd 환경을 설정하여 해당 프로젝트에 푸시나 merge가 발생됬을 때 자동으로 해당 프로젝트를 연결된 서버에 배포하는 작업을 구성하는 것입니다.
제가 다룰 CI/CD 는 Gitlab CI/CD 입니다

CI/CD 구성하기
일단 프로젝트가 올라가는 서버에 Gitlab Runner 설치를 진행해야합니다.
설치 URL : https://docs.gitlab.com/runner/install/
해당 링크에서 자신의 프로젝트에 맞는 OS환경을 찾아 설치작업을 진행하면 됩니다.
Install GitLab Runner | GitLab
Documentation for GitLab Community Edition, GitLab Enterprise Edition, Omnibus GitLab, and GitLab Runner.
docs.gitlab.com
| [FYI - Gitlab 삭제 및 재설치 시 오류 발생으로 인한 메모] 저는 이번에 새로 작업을 해보기위해 리눅스에서 기존 runner를 삭제하고 재설치 작업을 진행 해보려했는데, Failed to download metadata for repo 'runner_gitlab-runner-source': repomd.xml 이런 에러메세지가 떨어지면서 재설치가 원활히 이뤄지지 않았습니다. 문제는 기존 runner 삭제 작업중에 관련된 캐시 데이터가 남아있던게 원인이었습니다. 해당 명령어로 캐시파일을 삭제한 후 다음 단계를 진행했습니다. |
1. Add the official GitLab repository : For RHEL/CentOS/Fedora:
curl -L "https://packages.gitlab.com/install/repositories/runner/gitlab-runner/script.rpm.sh" | sudo bash
2. Install the latest version of GitLab Runner : For RHEL/CentOS/Fedora:
sudo yum install gitlab-runner위 과정을 통해 설치를 마쳤습니다.
3. 러너 등록
sudo gitlab-runner register
1.gitlab 주소 입력
- Enter the GitLab instance URL (for example, https://gitlab.com/) :
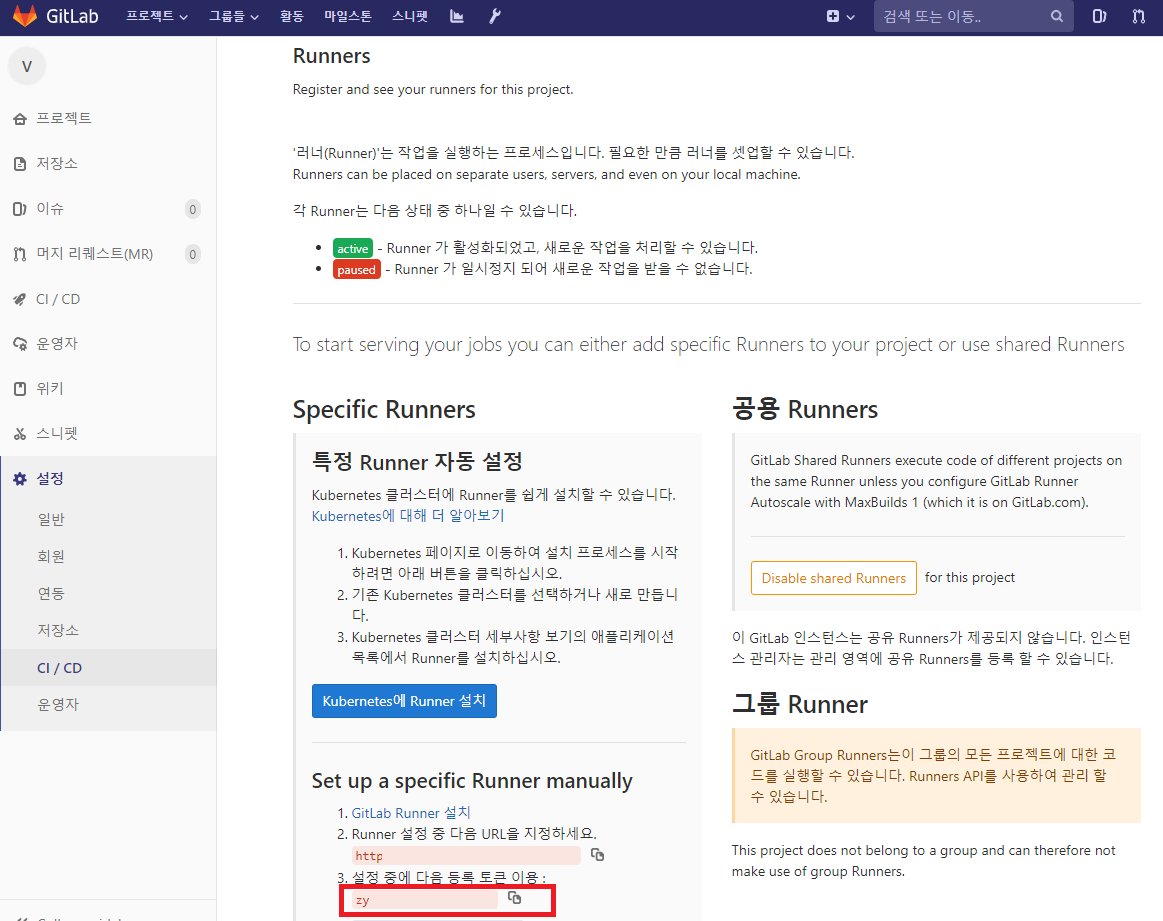
2.gitlab 설정 ci/cd 토큰 값 입력
- Enter the registration token:

3.runner 설명
- Enter a description for the runner:
4.runner tag명 등록(.gitlab-ci.yml에서 러너 선택에 활용 됨)
- Enter tags for the runner (comma-separated):
5.부가 노트 등록(사용처를 모르겠음)
- Enter optional maintenance note for the runner:
Registering runner... succeeded runner=zyxkpVbq
6.실행 형식 선택
- Enter an executor: custom, docker, docker-ssh, docker+machine, docker-ssh+machine, parallels,
shell, ssh, virtualbox, kubernetes:
7.등록 완료
- Runner registered successfully. Feel free to start it, but if it's running already the config should be
automatically reloaded!
8. Runner 실행(기본적으로 자동 실행)
- gitlab-runner start
- gitlab-runner run
| [gitlab-runner 명령어] NAME: gitlab-runner - a GitLab Runner USAGE: gitlab-runner [global options] command [command options] [arguments...] VERSION: 13.0.0 (HEAD) AUTHOR: GitLab Inc. <support@gitlab.com> COMMANDS: exec execute a build locally list List all configured runners run run multi runner service register register a new runner install install service uninstall uninstall service start start service stop stop service restart restart service status get status of a service run-single start single runner unregister unregister specific runner verify verify all registered runners artifacts-downloader download and extract build artifacts (internal) artifacts-uploader create and upload build artifacts (internal) cache-archiver create and upload cache artifacts (internal) cache-extractor download and extract cache artifacts (internal) cache-init changed permissions for cache paths (internal) health-check check health for a specific address help, h Shows a list of commands or help for one command |

이것으로 러너설정이 완료되었습니다.
이제 러너 설정을 완료했으니, 브랜치에 이벤트가 발생했을때 러너에게 시킬 작업을 설정해야할 차례입니다.
바로 .gitlab-ci.yml 파일을 설정하는 작업입니다.
내용이 길어져서 다음 포스팅에서 정리하겠습니다.
'DevOps' 카테고리의 다른 글
| GitLab CI/CD 환경 구성 3 : .gitlab-ci.yml 작성하기(feat. gradle) (0) | 2022.07.22 |
|---|---|
| GitLab CI/CD 환경 구성 2 : .gitlab-ci.yml 작성하기(feat. npm) (0) | 2022.07.10 |


댓글